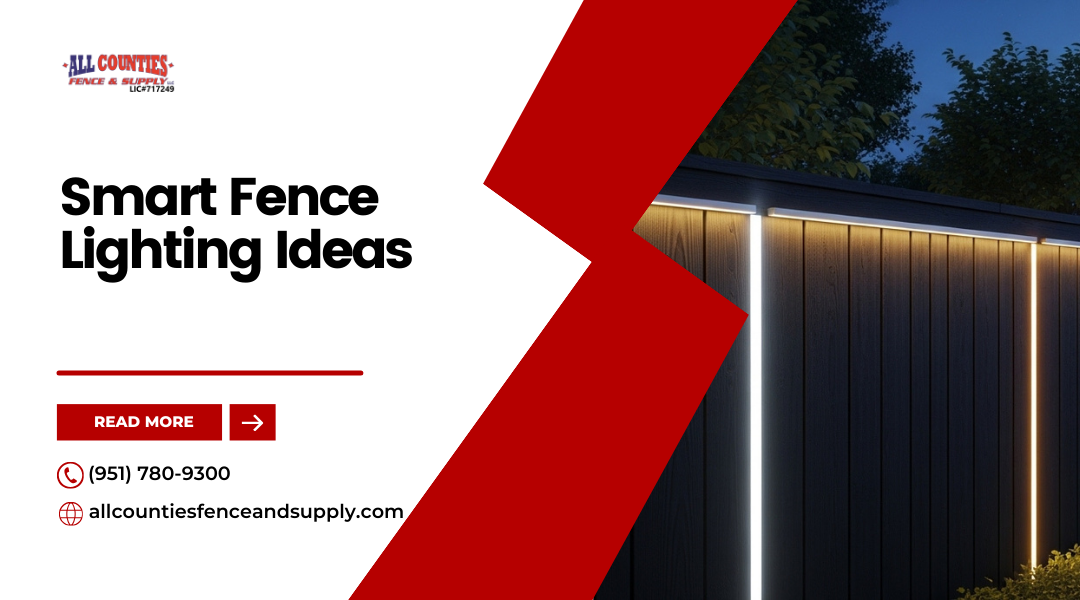
A well-lit fence does more than define your property line—it creates a safer, more welcoming environment. By adding smart fence lighting, you enhance curb appeal while improving security around your home. The right lighting choices highlight your fence design, guide pathways, and deter unwanted activity, all while giving your property a polished, modern look.
With today’s technology, you can choose from solar-powered fixtures, low-voltage systems, and smart integrations that connect seamlessly with your home setup. Motion sensors, timers, and app-based controls make it easier to manage lighting for both style and safety. These options let you enjoy an outdoor space that looks inviting at night without sacrificing practicality.
At All Counties Fence & Supply in Riverside, you’ll find solutions designed to work with the region’s climate and neighborhood styles. Whether you want subtle accents that showcase your landscaping or brighter fixtures that secure your perimeter, the right approach ensures your fence becomes both a design feature and a protective asset.
Why Fence Lighting Matters in Riverside
Fence lighting improves the way your property looks at night while also making it safer and more secure. In Riverside, where outdoor living is common and climate conditions can be harsh, the right lighting choices help you maintain both style and function year-round.
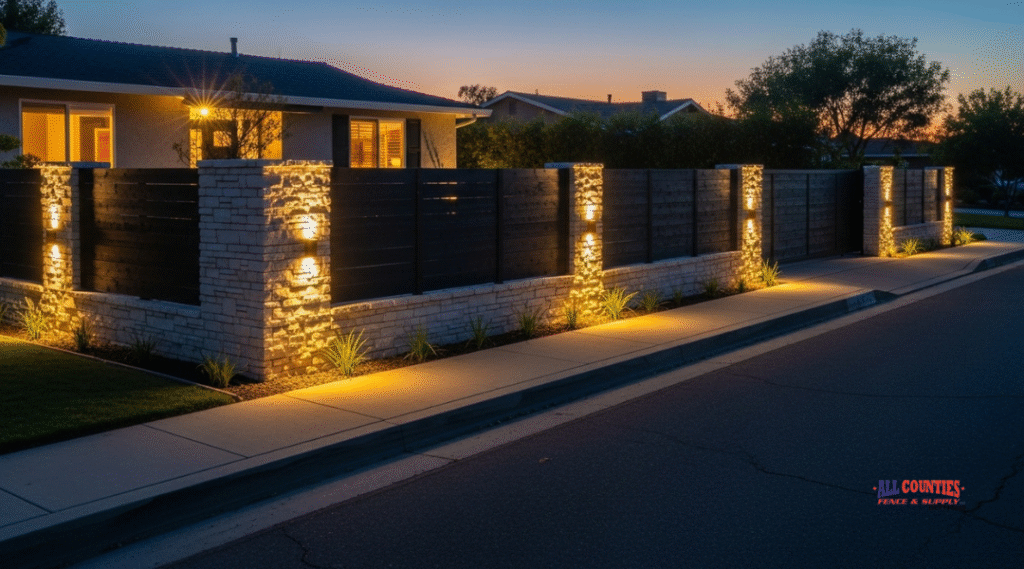
Nighttime Curb Appeal in Inland Empire Neighborhoods
Well-placed lighting makes your fence stand out after sunset. It highlights textures, colors, and materials that might otherwise go unnoticed in the dark. A lit fence also creates a clear boundary line, giving your property a more polished and maintained appearance.
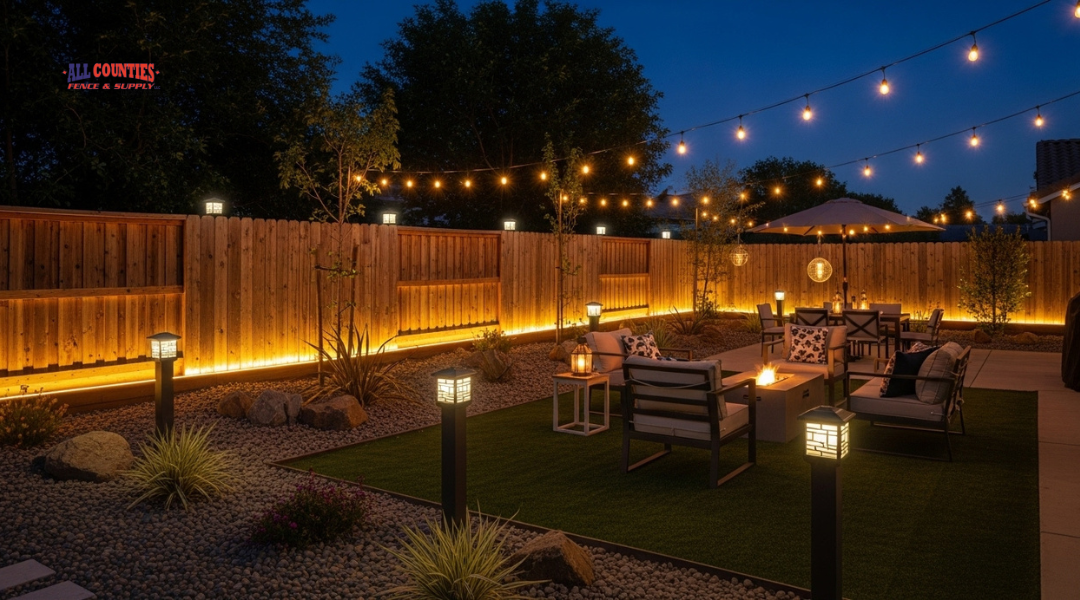
In neighborhoods across the Inland Empire, outdoor gatherings often extend into the evening. Warm, low-level lighting along your fence can make your yard feel inviting without overwhelming the space. This is especially useful when hosting family, friends, or neighbors.
You can choose from several options that balance aesthetics and efficiency:
- Solar post caps for a soft, consistent glow
- LED strip lights for a modern, sleek effect
- Lantern-style fixtures for a traditional look
Each option allows you to match the lighting style to your home’s architecture while keeping energy costs manageable.
Deterrence and Visibility for Gates and Cameras
Lighting also plays a practical role in security. A well-lit fence reduces dark corners where trespassers could hide. Brightness near gates and entry points makes it harder for anyone to approach unnoticed.
If you use security cameras, proper lighting improves visibility and recording quality. Motion-activated lights can be especially effective, providing illumination only when needed while conserving energy.
For added safety, consider placing fixtures at:
- Gate entrances
- Fence corners
- Pathways leading to doors or patios
This setup not only deters intruders but also helps you and your guests move safely around the property at night.
Heat, Dust, and Drought Factors That Affect Fixtures
Riverside’s climate creates unique challenges for outdoor lighting. High summer heat, frequent dust, and limited rainfall mean fixtures must be durable and low-maintenance. Choosing the wrong materials can lead to fading, cracking, or electrical issues over time.
Look for weather-rated fixtures designed for high temperatures. Powder-coated metals or UV-resistant plastics last longer under direct sun exposure. Sealed housings protect against dust, which is common in dry months.
Energy-efficient options like solar or LED lights also reduce stress on your system during peak heat. These fixtures require minimal upkeep and perform reliably in drought-prone areas where water conservation is a priority.
By selecting lighting built for Riverside’s environment, you ensure that your fence remains both functional and attractive for years.
Lighting Types and Power Options
Outdoor fence lighting can run on different power sources, each with its own strengths for cost, efficiency, and safety. Choosing the right setup depends on how much brightness you need, your yard’s layout, and the long-term maintenance you’re willing to handle.
Low-Voltage LED Systems
Low-voltage LED systems use a transformer to step down standard household current to a safer 12 volts. This makes them energy-efficient and easier to install than full line-voltage wiring.
You can run these lights along fence posts, pathways, or gates without worrying about excessive power use. LEDs last thousands of hours, reducing how often you need to replace bulbs.
These systems also allow dimming and smart controls, giving you flexibility in brightness and scheduling. For most residential fences, low-voltage LEDs strike a balance between safety, durability, and consistent light output.
Solar Fence Lights and When They Perform Well in Riverside
Solar fence lights rely on built-in panels that charge during the day and power LEDs at night. In Riverside, where sunlight is abundant most of the year, solar lights perform reliably and reduce your energy costs.
They work best when mounted in areas with direct sun exposure for at least 6–8 hours daily. Shaded fences or north-facing panels may not provide enough charge for full-night operation.
Solar lights are easy to install since they don’t require wiring. However, you should expect reduced brightness on cloudy days or during shorter winter daylight hours. For consistent results, use them as accent lighting rather than your primary security illumination.
Line-Voltage Options and Basic Safety
Line-voltage lighting uses the same 120-volt power as your home outlets. These fixtures can produce stronger illumination, making them useful for large yards, driveways, or perimeter fences where security is a priority.
Because of the higher voltage, installation requires proper conduit, weatherproof boxes, and compliance with electrical codes. In most cases, you’ll need a licensed electrician to ensure safety.
Line-voltage lights are durable and can handle heavy-duty applications, but they also increase energy use compared to low-voltage or solar systems. If you want bright, wide coverage, this option delivers but comes with higher installation and operating costs.
Battery and Rechargeable Setups
Battery-powered fence lights give you flexibility when wiring isn’t practical. You can mount them anywhere, and many models now use rechargeable lithium batteries for longer runtimes.
Some designs combine solar charging with rechargeable storage, reducing how often you need to replace or recharge batteries. This makes them useful for areas where you want temporary or movable lighting.
Keep in mind that battery lights usually emit less brightness than wired options. They work best as accent lighting or in spots where you don’t want to run cables, such as remote fence lines or garden corners.
Fixture Styles for Fences
Lighting fixtures on fences serve both practical and visual purposes. The right style can improve nighttime safety, highlight landscaping, and add a polished look to your property. Each type of fixture works best in specific areas, so choosing carefully ensures balanced curb appeal and reliable security.
Post Cap Lights
Post cap lights sit directly on top of fence posts, giving you an easy way to combine function with design. They provide soft, even light across your fence line without creating harsh glare.
You can find them in solar, low-voltage, or hardwired options. Solar post caps are convenient for areas without wiring, while low-voltage systems tie into your existing landscape lighting for consistent performance.
These fixtures also protect the post from weather damage by sealing the top surface. If you want a uniform look, choose a style that matches your fence material—wood, vinyl, or metal. Post cap lights work well for perimeter fencing where you want steady illumination and a decorative accent.
Downlights for Neighbor-Friendly Illumination
Downlights direct light toward the ground, making them a considerate option when you want visibility without shining into a neighbor’s windows. Mounted on fence posts or overhead structures, they create targeted pools of light along walkways, patios, or garden edges.
Because the beam points downward, you reduce light pollution and keep your property line well-defined. This makes downlights useful for suburban neighborhoods where shared boundaries are common.
When integrated into a low-voltage system, you can adjust brightness with timers or dimmers. Choose fixtures with shielded housings to prevent glare and keep the light focused where you need it most.
Uplights for Columns, Plants, and Features
Uplights highlight vertical elements such as fence columns, trees, or decorative shrubs. By angling light upward, you create contrast that draws attention to architectural details and landscaping.
You can install uplights at the base of stone or brick columns to emphasize texture. For plantings near the fence, uplights showcase foliage and add depth to your yard at night.
Many homeowners use LED uplights because they produce strong illumination with low energy use. If you want flexibility, look for fixtures with adjustable heads so you can redirect the beam as your landscape changes.
Linear Strip Lighting Along Rails
Linear strip lighting runs along the horizontal rails of your fence, producing a continuous line of light. This style works well for modern designs where clean lines and uniform illumination are important.
LED strips are the most common choice because they are slim, energy-efficient, and available in weather-resistant casings. You can mount them under the top rail to conceal the fixture while still lighting the fence surface.
This option is especially effective for highlighting long stretches of fencing or creating a subtle glow along property boundaries. For best results, connect the strips to a low-voltage transformer that ties into your existing landscape lighting system.
Gate and Keypad Task Lighting
Gates and entry points benefit from dedicated task lighting. A small fixture above or beside the gate makes it easier to unlock latches, operate keypads, or use intercom systems after dark.
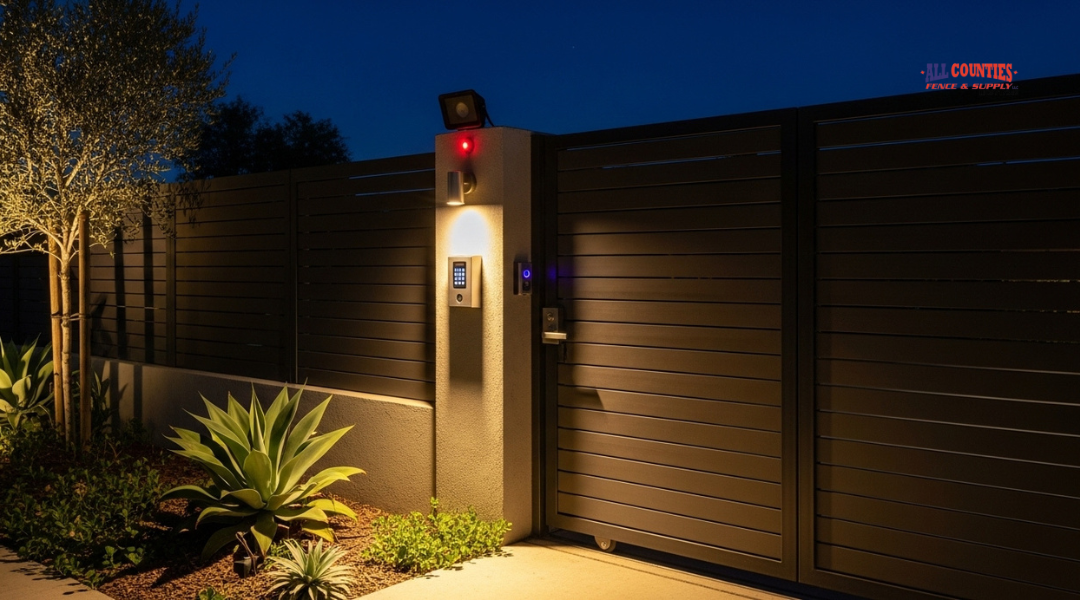
You can choose between motion-activated lights for hands-free convenience or steady low-voltage fixtures for constant visibility. Placement matters—install lights at a height that illuminates the lock area without casting strong shadows.
For properties with automated gates, pairing keypad lighting with security cameras ensures clear visibility at access points. This type of lighting combines practicality with safety, making daily use more convenient.
Step and Pathway Lights at Fence Lines
If your fence runs alongside a walkway or includes steps, pathway lighting improves safety and guides movement. These fixtures sit low to the ground, casting light across walking surfaces without overpowering surrounding areas.
Common designs include bollard lights, recessed step lights, and stake-mounted fixtures. Each provides targeted illumination to reduce tripping hazards and make outdoor spaces easier to navigate.
Position pathway lights evenly along the fence line for consistent coverage. When matched with other fence lighting styles, they create a cohesive system that balances aesthetics with function. Many homeowners integrate them into broader landscape lighting to unify the entire outdoor space.
Smart Controls and Integrations
Smart fence lighting systems give you more than just illumination. By combining sensors, schedules, and connected devices, you can manage energy use, improve security, and create a consistent look for your property.
Motion Sensors and Occupancy Triggers
Motion sensors activate your fence lights only when movement is detected. This helps deter trespassers while reducing unnecessary energy use. You can adjust sensitivity levels to avoid false triggers from small animals or wind-blown objects.
Some systems allow you to set zones, so only certain sections of your fence light up when motion occurs. This targeted response can make your lighting more efficient and less intrusive for neighbors.
Pairing motion sensors with occupancy triggers ensures lights remain on only when someone is present. This combination works well for walkways, gates, and driveway entrances where safety and visibility matter most.
Timers, Photocells, and Schedules
Timers let you set fixed on/off times for your fence lighting. This is useful if you want consistent evening lighting without relying on manual switches.
Photocells automatically adjust based on natural light. Your lights turn on at dusk and off at dawn without needing daily input. This option works well if you want reliable operation that adapts to seasonal changes.
For more control, you can create custom schedules. For example:
- Weekdays: Lights on at 6:30 PM, off at 11:00 PM
- Weekends: Lights on at 7:00 PM, off at midnight
This approach balances security with energy savings.
App Control, Scenes, and Routines
Smartphone apps give you direct control over your fence lighting from anywhere. You can turn lights on or off, dim them, or check status when you’re away from home.
Scenes let you group lighting settings for specific situations. For example, you might set a “Security” scene with brighter lights along the perimeter and a “Relax” scene with softer lighting near patios.
Routines automate these scenes. A morning routine could shut lights off after sunrise, while an evening routine could gradually brighten them as it gets dark. These features reduce manual adjustments and keep your property looking consistent.
Alexa, Google, and Apple Integrations
Voice assistants like Amazon Alexa, Google Assistant, and Apple HomeKit add hands-free control. You can issue simple commands such as “turn on fence lights” or “dim front lights to 50%.”
Integration with these platforms also allows you to combine fence lighting with other smart devices. For example, you can set your gate lights to activate when your smart lock opens.
If you already use a smart home ecosystem, choosing compatible lighting ensures smooth operation. This avoids the need for multiple apps and creates a more streamlined experience.
Cameras with Built-In Lights
Some security cameras include integrated lighting that activates when motion is detected. This combines surveillance with illumination, reducing the need for separate fixtures.
Built-in lights can be set to different brightness levels, making them useful for both security and general visibility. You can also configure them to stay on for a set duration after motion is detected.
These cameras often connect to mobile apps, letting you view footage and control lighting in one place. This dual-function setup simplifies installation and provides a stronger layer of security for your fence line.
Design Principles That Balance Beauty and Security
Smart fence lighting works best when it combines visual appeal with practical safety. By focusing on placement, light quality, and responsible design, you can create a system that enhances your property without overwhelming it.
Layered Zones: Perimeter, Entries, Paths, Features
A layered approach ensures that each part of your property receives the right level of illumination. The perimeter should have consistent but subtle lighting to define boundaries without creating harsh brightness. Solar post caps or low-voltage fixtures often work well here.
Entry points such as gates and driveways benefit from brighter, motion-activated lights. This not only highlights access areas but also discourages unwanted visitors. Using adjustable spotlights allows you to target these spaces without wasting energy.
Paths and walkways should use low-mounted lights that guide movement safely. Step lights, bollards, or recessed fixtures along fence bases reduce tripping hazards while maintaining a clean look.
Accent lighting for features like landscaping or architectural details adds depth. By layering these zones, you create an outdoor environment that feels both secure and inviting.
Color Temperature and CRI for Natural Tones
The color of light affects how your outdoor space looks and feels. Warm white light (2700K–3000K) creates a welcoming atmosphere, while neutral white (3500K–4000K) provides clearer visibility for security. Choosing the correct temperature helps you balance comfort with functionality.
Color Rendering Index (CRI) measures how accurately colors appear under a light source. A CRI of 80 or higher ensures plants, pathways, and finishes look natural rather than distorted. This is especially useful if your fence lighting highlights landscaping or decorative materials.
Mixing temperatures can be effective. For example, use warm tones for entertaining areas and cooler tones for driveways or entrances. This separation helps you achieve both beauty and safety without compromising either.
Beam Spread, Spacing, and Glare Control
Beam spread determines how wide or narrow the light projects. Narrow beams (15°–30°) work well for highlighting specific features, while wider beams (60°–120°) cover larger areas like fence lines. Choosing the right beam prevents uneven lighting.
Spacing is equally important. Placing lights too close creates hotspots, while spacing them too far apart leaves dark gaps. A consistent rhythm along the fence creates balance and avoids wasted energy.
Glare control improves both comfort and security. Shielded fixtures, frosted lenses, or downward-facing designs reduce harsh brightness. This keeps the light where you need it and prevents discomfort for you or your neighbors.
Dark-Sky Tips and Reducing Light Trespass
Excessive lighting can cause glare, waste energy, and disturb nearby properties. Following dark-sky principles helps you minimize these problems while still meeting your needs.
Use fixtures with full cut-off designs that direct light downward. This reduces skyglow and keeps illumination focused on your fence and yard. Avoid overly bright bulbs; instead, choose moderate lumens that provide safety without overpowering the space.
Timers, dimmers, and motion sensors are practical tools to control usage. They ensure lights operate only when necessary, cutting down on energy costs and unwanted spill.
By reducing light trespass, you respect your neighbors’ privacy while maintaining a secure and attractive outdoor environment. This balance makes your property safer and more comfortable without unnecessary impact.
Safety, Codes, and HOA Considerations
When adding lighting to your fence, you need to account for safety regulations, electrical requirements, and neighborhood rules. Proper planning ensures your upgrades comply with code, protect your property, and maintain good relations with your community.
Pool and Spa Proximity Rules
If your fence lighting is near a pool or spa, placement becomes more restrictive. Electrical equipment within certain distances must meet National Electrical Code (NEC) standards to prevent shock hazards. For example, low-voltage lighting is often required within 5 feet of the water’s edge.
You also need to confirm that fixtures are rated for wet or damp locations. Using the wrong type of light near water increases the risk of electrical failure.
Many cities in California, including Riverside, enforce strict pool safety codes that cover barriers, gates, and lighting. Installing lights too close to the water without proper certification can lead to failed inspections.
Always check with your local building department before installation. A licensed contractor can help you determine safe distances and ensure your lighting system passes inspection.
Electrical Safety and GFCI Requirements
Any outdoor lighting project must follow electrical safety codes. Ground Fault Circuit Interrupters (GFCIs) are required for outlets and circuits exposed to weather. These devices shut off power if they detect current leakage, reducing the risk of shock.
When wiring fence lights, you should use weatherproof junction boxes and outdoor-rated conduit. All connections must be sealed to prevent moisture intrusion. Even solar-powered systems may require safe wiring if they connect to low-voltage transformers.
Voltage matters as well. Low-voltage (12V) LED systems are safer and more energy-efficient than 120V fixtures. They also simplify installation and reduce the need for deep trenching.
If you are not comfortable with electrical work, hire a qualified electrician. Improper wiring can void warranties, damage fixtures, or create fire hazards.
HOA Approvals and Neighbor-Friendly Placement
If you live in a community with a homeowners association (HOA), you may need written approval before installing fence lighting. HOAs often regulate fixture style, brightness, and color temperature to maintain a uniform neighborhood appearance.
You should review your HOA’s architectural guidelines before purchasing equipment. Some associations prohibit colored lights or require fixtures to be shielded to prevent glare onto neighboring properties.
Submitting a simple plan with fixture types, placement, and photos usually speeds up approval. This step avoids disputes and ensures your project complies with community rules.
Being considerate of your neighbors also matters. Keep lights directed toward your yard and avoid shining into windows or outdoor living spaces.
Sightlines for Streets and Driveways
Fence lighting should never obstruct visibility for drivers or pedestrians. Bright fixtures placed at eye level can cause glare, while poorly positioned posts may block a clear line of sight.
When installing lights near a driveway, place them low to the ground or shield them to reduce glare. This improves safety for vehicles entering and exiting your property.
Street-facing fences require extra care. Lights should highlight your home without distracting passing drivers. Avoid flashing or color-changing lights in these areas, as they can resemble traffic signals and create hazards.
A good guideline is to keep lights no higher than the fence line and angle them downward. This ensures illumination stays on your property while preserving visibility along streets and sidewalks.
Riverside-Specific Planning Tips
Riverside’s climate brings unique challenges for outdoor lighting. You need to consider hard water buildup, high summer heat, strong sun exposure, and seasonal winds that carry dust. Proper planning helps extend the life of your fence lights while keeping your yard safe, attractive, and functional.
Hard Water Spot Prevention on Lenses
Riverside’s water supply often leaves mineral deposits when sprinklers overspray onto lights. These spots can cloud lenses and reduce brightness over time. You should position fixtures away from direct sprinkler spray, especially near flower beds where irrigation runs frequently.
Use angled shields or deflectors to reduce water contact. For fixtures already exposed, wipe lenses regularly with a vinegar-water solution to dissolve calcium buildup. Avoid abrasive cleaners that can scratch plastic or glass covers.
When selecting lights, choose models with removable or replaceable lenses. This makes it easier to clean or swap them if deposits become too stubborn. Preventing buildup early saves you from reduced light output and unnecessary replacements.
Heat Resistance, UV Stability, and IP Ratings
Riverside summers often exceed 100°F, and prolonged sunlight can degrade cheaper plastics. You should select fixtures made from UV-stabilized polycarbonate or powder-coated aluminum to resist fading and cracking.
Check the IP rating before purchase. An IP65 or higher rating ensures dust protection and resistance to water jets from sprinklers or rain. For recessed or ground-level lights, IP67 or IP68 is safer since they may come into contact with standing water.
Heat-resistant LEDs are essential. Standard LEDs may dim or fail in high heat, so look for models rated for ambient temperatures up to 120°F. This ensures consistent performance even during peak summer afternoons.
Solar Placement and Shade from Walls or Trees
Solar-powered lights are popular in Riverside, but their performance depends on proper placement. You should install panels where they receive 6–8 hours of direct sun daily. Avoid shaded areas near tall walls, fences, or mature trees.
If shade is unavoidable, consider lights with remote solar panels. These allow you to mount the panel in a sunny spot while keeping the fixture where you want it.
Check panel tilt and orientation. In Riverside, panels angled slightly south collect the most sunlight. Regularly clear dust from panels, especially during dry months, to maintain charging efficiency.
Wind and Dust Protection
Seasonal Santa Ana winds can carry fine dust that settles on fixtures and lenses. You should clean lights with a soft cloth every few weeks to keep illumination clear. Dust buildup not only reduces brightness but can also trap heat, shortening the lifespan of components.
Choose fixtures with sealed housings and gasketed covers to keep out dirt. Avoid open-bulb designs in exposed areas since they collect debris quickly.
For string or hanging lights, secure them with weather-rated clips or guide wires. This prevents sagging or breakage during strong gusts. Around flower beds, low-profile fixtures with sturdy stakes resist shifting in loose soil during high winds.
Installation Options with All Counties Fence & Supply
Proper planning, precise electrical design, and careful installation ensure your fence lighting system looks professional and performs reliably. Attention to layout, wiring, and fixture placement also helps maximize both curb appeal and nighttime security.
Site Walk, Layout, and Fixture Selection
You begin with a site walk to evaluate your property and existing fence structure. This step identifies natural focal points, dark areas that need illumination, and any obstructions that could affect light placement.
A clear layout plan follows, marking fixture positions along posts, rails, or fence lines. You also decide whether to highlight landscaping, pathways, or architectural details.
Fixture selection is tailored to your goals. For example:
- Solar post caps for low-maintenance glow
- LED sconces for consistent wall lighting
- Motion sensor lights for security zones
By matching fixture type to purpose, you create a balanced design that avoids over-lighting and uneven coverage.
Transformer Sizing and Wiring Plan
Low-voltage fence lighting requires a properly sized transformer. You calculate total wattage by adding the power draw of all fixtures, then select a transformer rated at least 20% higher for safe operation.
Placement of the transformer is equally important. It should be near a power source, protected from weather, and accessible for maintenance.
A wiring plan maps how cables run along the fence line. You consider voltage drop by keeping wire runs balanced and avoiding long single circuits. For larger projects, you may use multiple runs or heavier gauge wire.
Using a simple table helps organize this step:
| Fixture Count | Total Wattage | Recommended Transformer | Wire Gauge |
|---|---|---|---|
| 10 lights | 80W | 120W transformer | 12 AWG |
| 20 lights | 160W | 200W transformer | 10 AWG |
Trenching, Conduit, and Mounting Methods
Cables are typically buried in shallow trenches or routed through conduit to protect them from weather, pets, and lawn equipment. Depth depends on local code, but 6–12 inches is common for low-voltage systems.
Where conduit is used, PVC is most common for durability and ease of installation. You secure conduit along posts or underground depending on the layout.
Mounting methods vary by fixture type. Post cap lights attach directly to fence posts, while wall-mounted sconces require brackets and anchors. For in-ground lights, housings are set flush with grade to prevent tripping hazards.
Each method ensures both safety and longevity of the system.
Testing, Aiming, and Final Walkthrough
Once fixtures are installed and wiring is complete, you test each run to confirm proper voltage and consistent illumination. Any dim lights or uneven brightness are corrected by adjusting wire lengths or transformer taps.
Aiming fixtures is the next step. You angle spotlights to highlight features without glare spilling into neighboring properties or windows.
Finally, a walkthrough ensures everything meets your expectations. You verify switch locations, sensor response, and timer settings. Adjustments are made on the spot so the system is fully functional before completion.
Budget, ROI, and Operating Costs
Smart fence lighting affects both the upfront investment and the long-term expenses tied to energy use, maintenance, and financing. The right lighting choice can improve property value, add security, and reduce operating costs when planned with efficiency in mind.
Upfront Cost vs Maintenance Over 5 Years
The initial cost depends on the type of lighting system you choose. Hardwired LED fixtures generally cost more to install due to wiring and labor, while solar-powered units are easier to set up and usually require little to no wiring.
Over a five-year period, ongoing maintenance becomes a major factor. LEDs typically last 25,000–50,000 hours, meaning you may not need replacements for years. Solar lights, while low-maintenance, may require battery replacements every 2–3 years depending on quality.
A simple breakdown:
| Lighting Type | Average Install Cost (per unit) | Typical Maintenance (5 yrs) | Longevity |
|---|---|---|---|
| LED Wired | $50–$150 | Low (bulb replacement rare) | 10+ years |
| Solar | $30–$100 | Medium (battery swaps) | 5–7 years |
Factoring both installation and upkeep, LEDs may cost more upfront but often provide lower lifetime costs.
Energy Use for LED vs Solar
Energy consumption is where the biggest savings occur. LED fixtures use about 75% less electricity than incandescent bulbs, averaging 8–12 watts per fixture. If you run 10 LED fence lights for 6 hours nightly, the monthly cost is usually under $2–$3 at typical utility rates.
Solar-powered lights eliminate utility costs altogether but depend on sun exposure. In shaded areas, performance may be inconsistent, requiring backup fixtures or higher-quality solar panels. While solar has no direct energy bill, you should budget for battery replacements, which can add $10–$20 per unit every few years.
For property value, LED systems wired into your home’s electrical grid may appeal more to buyers who want reliability, while solar appeals to those prioritizing sustainability and low operating costs.
Phased Upgrades and Financing Options
If a full installation feels costly, you can approach lighting upgrades in phases. Start with key areas such as entry gates, driveways, or backyard seating areas, then expand to the full perimeter over time. This approach spreads out both labor and equipment expenses.
Financing options are also available through many contractors. Some homeowners use home improvement loans or 0% promotional credit cards to cover upfront costs. For larger properties, financing can make higher-quality systems like smart LED networks more accessible without straining your budget.
By balancing phased upgrades with financing, you can improve curb appeal and security while keeping monthly expenses predictable. This staged approach also allows you to monitor how improvements affect property value before committing to a full-scale installation.
Maintenance and Troubleshooting
Keeping your fence lighting in good condition requires attention to both physical components and digital features. Regular upkeep extends the life of fixtures, ensures consistent brightness, and prevents small issues from turning into costly repairs.
Cleaning Schedules and Corrosion Control
Outdoor lights collect dust, pollen, and water spots that reduce brightness. You should clean lenses every 2–3 months with a soft cloth and mild soap solution. Avoid abrasive cleaners, as they can scratch the surface and scatter light unevenly.
Moisture and soil contact can lead to corrosion on metal housings and connectors. Apply a thin coat of dielectric grease to exposed terminals to reduce oxidation. For fixtures near sprinklers or coastal air, check monthly for rust or discoloration.
If you notice white deposits or green corrosion, disconnect power and scrub gently with a small wire brush. Re-seal connections with weatherproof tape or silicone covers. Consistent cleaning and sealing will prevent electrical shorts and extend fixture life.
Replacing Drivers, Batteries, and Lenses
LED drivers regulate power flow and may fail after years of use. If lights flicker or dim unevenly, test the driver with a multimeter and replace it with a model that matches the original voltage and wattage rating.
Solar and low-voltage systems often rely on rechargeable batteries. These typically last 2–4 years. If lights fade quickly after charging, replace the battery with the same type and capacity. Always check manufacturer labeling before installing replacements.
Lenses can yellow or crack from UV exposure. A cloudy lens reduces brightness significantly. Swap out damaged lenses by loosening the retaining ring or screws. Use clear polycarbonate replacements for durability. Keeping spare lenses on hand helps you restore lighting quickly without downtime.
App Updates, Connectivity, and Range Issues
Smart fence lights often connect through Wi-Fi, Bluetooth, or proprietary hubs. If lights stop responding, confirm that your router or hub is within the recommended range, usually 30–50 feet for Bluetooth and farther for Wi-Fi.
Check for firmware or app updates every few months. Updates often fix connectivity bugs and improve scheduling features. Enable automatic updates when available to avoid missed patches.
If lights disconnect frequently, reduce interference by moving routers away from thick walls or metal fences. For larger yards, consider adding a Wi-Fi extender or mesh system. Resetting the light’s controller and re-pairing it with the app often resolves persistent issues.
Smart Use Cases and Ideas
Smart fence lighting can improve how you move around your property, add convenience during gatherings, strengthen nighttime security, and make outdoor areas safer for pets. Each setup focuses on practical benefits that make your fence more functional while also adding value to your home.
Path-to-Porch Guide Lighting
Installing low-profile lights along your fence line creates a clear route from the street or driveway to your porch. This helps prevent tripping hazards and makes your property easier to navigate after dark.
You can use motion-activated lights near gates and entry points so that illumination only turns on when needed. This reduces energy use while still offering visibility at the right moments.
For consistent brightness, consider solar-powered fence lights with dusk-to-dawn sensors. These operate automatically without requiring complex wiring. If your fence borders a long walkway, spacing lights about 6–8 feet apart ensures even coverage without over-lighting.
Adding warm white bulbs creates a welcoming look, while cooler tones provide a modern appearance. A simple combination of both can balance safety and design.
Party Scenes and Holiday Automations
Smart fence lighting can also enhance outdoor gatherings. By linking your lights to a smart hub or app, you can create preset “scenes” that adjust brightness and color for different occasions.
For example, you might set a soft amber glow for casual evenings or brighter tones for outdoor dining. During holidays, you can schedule color-changing modes to match seasonal themes without needing temporary string lights.
Automation features let you program lights to turn on at sunset and off at a set time. This removes the need for manual adjustments and ensures your yard is always ready for guests.
If you use voice assistants like Alexa or Google Home, you can change lighting modes hands-free. This adds convenience when entertaining and keeps your focus on hosting rather than managing controls.
Security Sweep Mode for Late Nights
Smart fence lighting can serve as a security measure when programmed for late-night activity. A useful setup is a sweep mode, where lights activate in sequence along the fence line when motion is detected.
This creates a clear visual alert and deters unwanted visitors by making movement obvious. Unlike standard floodlights, sequential lighting feels less harsh and provides a controlled sense of coverage.
You can adjust sensitivity levels to avoid unnecessary triggers from passing cars or small animals. Integrating the lights with security cameras or alarms strengthens the overall system.
For added reliability, choose LED fixtures with weather resistance so they continue working during rain or heat. Consistent performance ensures your property stays protected without frequent maintenance.
Pet Run and Side Yard Lighting
Side yards and pet runs often lack proper lighting, which can make them unsafe at night. Adding smart fence lights in these areas helps you monitor pets and move around without difficulty.
Motion-sensor lights are effective here because they activate only when movement occurs. This prevents wasted energy while ensuring visibility when pets are active.
For pet runs, low-mounted fixtures along the fence keep the ground lit without shining directly into your neighbor’s property. This design reduces glare and keeps the space comfortable for animals.
If you want more control, use a timer or smartphone app to set specific hours for illumination. This way, the area stays bright during evening walks but powers down when not in use.
Common Mistakes to Avoid
Lighting along a fence can improve both appearance and safety, but certain missteps reduce effectiveness and even create problems for neighbors. Paying attention to fixture placement, consistency, durability, and long-term maintenance helps you avoid unnecessary costs and complaints.
Overlighting and Glare at Property Lines
Installing fixtures that are too bright or positioned poorly can cause glare that spills onto neighboring properties. This not only disrupts their comfort but may also violate local lighting ordinances.
You should aim for focused, downward-facing lights that illuminate the fence and yard without spreading beyond your boundary. Shielded fixtures or adjustable heads help control the beam.
Consider using lumens instead of watts as your guide. For fence lighting, 100–300 lumens per fixture is usually sufficient. Higher outputs often create harsh light instead of subtle, useful illumination.
A simple test is to walk to the edge of your property after installation and check visibility. If the light feels intrusive or uncomfortable at the property line, reduce brightness or adjust the angle.
Mixing Mismatched Color Temperatures
Using different color temperatures along the same fence creates an uneven appearance. For example, combining a warm 2700K light with a cooler 5000K fixture makes the yard look inconsistent and distracts from the overall design.
You should choose a consistent Kelvin rating for all fixtures. Most residential fence projects look best in the 2700K–3000K range, which provides a warm and inviting glow.
Cooler temperatures above 4000K are better for security-focused areas but can feel harsh in a residential setting. If you need higher visibility, keep these lights separate from decorative fence lighting.
When replacing or expanding your system, check packaging for Kelvin ratings to ensure compatibility. Even small differences in color temperature are noticeable when fixtures are side by side.
Poor Weather Sealing on Low-End Fixtures
Outdoor lighting is exposed to rain, sprinklers, and dust. Choosing inexpensive fixtures without proper sealing often leads to corrosion, short circuits, or early failure.
Look for fixtures rated IP65 or higher for fence applications. This ensures resistance to both water and dust. Lower ratings may work temporarily but usually require frequent replacement.
Materials also matter. Powder-coated aluminum or stainless steel housings last longer than untreated metal or thin plastic. Investing in durable fixtures reduces long-term maintenance costs.
Check gaskets and seals before installation. If a fixture feels loose or poorly built, it likely won’t withstand multiple seasons outdoors. Spending slightly more upfront prevents repeated replacements.
Ignoring Access for Service and Repairs
Many homeowners install fence lighting without considering how they will maintain it later. Fixtures placed too high, too close to plants, or wired without junction access create difficulties when bulbs or drivers fail.
You should plan service access points along the fence. This can include removable panels, accessible junction boxes, or fixtures mounted at reachable heights.
Avoid burying wiring too shallow or without conduit, as this makes repairs difficult and increases the risk of damage from landscaping tools.
Regular maintenance checks are easier when you design for accessibility from the start. A well-planned layout saves time and reduces the need for costly service calls.
Why Choose All Counties Fence & Supply
When selecting a contractor for fence lighting, the details matter. The right materials, installation methods, and long-term support ensure your investment performs well in Riverside’s climate while also meeting your needs for safety and curb appeal.
Local Product Picks for Riverside Climate
Riverside’s hot summers, occasional rain, and dry winds require outdoor products that can handle temperature swings and UV exposure. You benefit from fence lighting fixtures and materials chosen specifically for these conditions, such as powder-coated metals, treated woods, and UV-resistant plastics.
By using products designed for outdoor durability, you avoid issues like premature fading, warping, or electrical failures. Solar-powered and low-voltage LED systems are also practical choices in Riverside, reducing energy use and handling heat better than traditional bulbs.
You gain access to lighting solutions that integrate seamlessly with fencing styles common in the area, whether horizontal slats, composite panels, or wrought iron. This local focus ensures your fence lighting looks natural while staying reliable year-round.
Licensed Installers and Clean Wiring Practices
Proper installation is critical for safety and performance. With licensed installers, you can expect wiring that meets code requirements and avoids hazards like exposed connections or overloaded circuits. This reduces risks of shorts, corrosion, and costly repairs.
Clean wiring practices also keep your fence lighting visually appealing. Conduits and junction boxes are placed discreetly, and connections are sealed to withstand moisture and dust. You won’t see tangled wires or messy attachments that detract from your fence’s appearance.
Installers can also integrate features like motion sensors, timers, or smart home compatibility during setup. This saves you from retrofitting later and ensures your system operates efficiently from day one.
Warranty Support and Service Plans
Lighting systems are an investment, and warranty coverage protects you from unexpected issues. You receive manufacturer-backed warranties on fixtures and components, along with installation guarantees from the contractor. This gives you confidence that any defects or failures will be addressed without extra cost.
Service plans can also be arranged for routine maintenance. These may include annual inspections, cleaning of solar panels, and replacement of worn components. Regular upkeep extends the life of your system and prevents small issues from escalating into major repairs.
By having warranty and service support in place, you reduce long-term costs while ensuring your fence lighting continues to function as intended.
Local Portfolio and References
Seeing completed projects in Riverside helps you evaluate quality before committing. You can review fences and lighting systems installed in neighborhoods similar to yours, giving you a clear idea of design options and durability.
Local references also provide feedback on installation timeliness, professionalism, and after-service support. Speaking with past clients gives you insight into what to expect during your project.
This transparency allows you to make informed decisions. Instead of relying only on claims, you can see proven results in real settings and hear directly from homeowners who worked with the company.